Mass Video Blaster Pro
$77Pros
- Great Value For Money
- Top Notch Support
- Bugs Fixed, Suggestions Implemented
- Does The Job
Cons
- Some Features Not Well Documented
- Some Features Now Redundant But Not Removed
Mass Video Baster Pro (MVB Pro) is an extremely useful piece of software for managing YouTube accounts. In this tutorial / review I will highlight some of the strengths & weaknesses along with providing a step-by-step guide to help you get up and running. I am happy to answer any questions you may have about the software, so don't hesitate to get in touch.
Mass Video Baster Pro is quite intuitive to use once you get going, however, there are a lot of options which could overwhelm first time users.
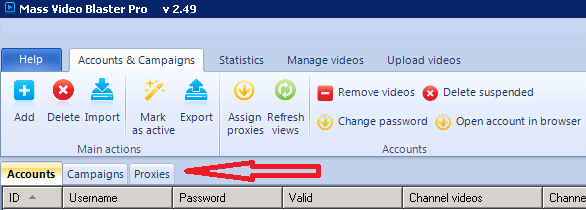
After loading up the software, you will find three tabs accounts > campaigns > proxies under "Accounts & Campaigns".
Proxies: if you’re looking to run multiple YouTube accounts and have them appear like they are run by separate people, then proxies are essential. If you’re unfamiliar with what proxies are, you can read about them here and buy some here.
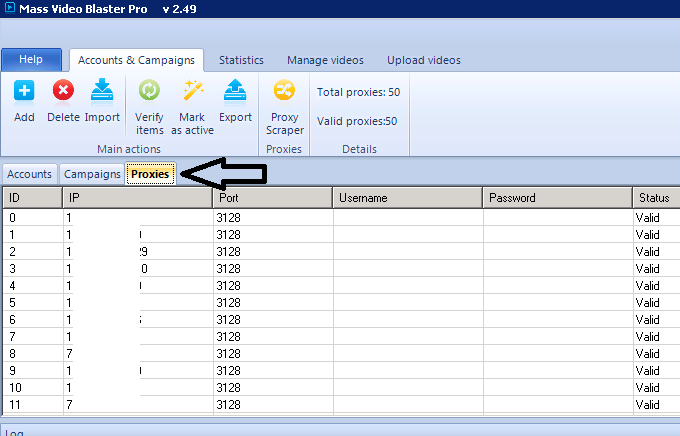
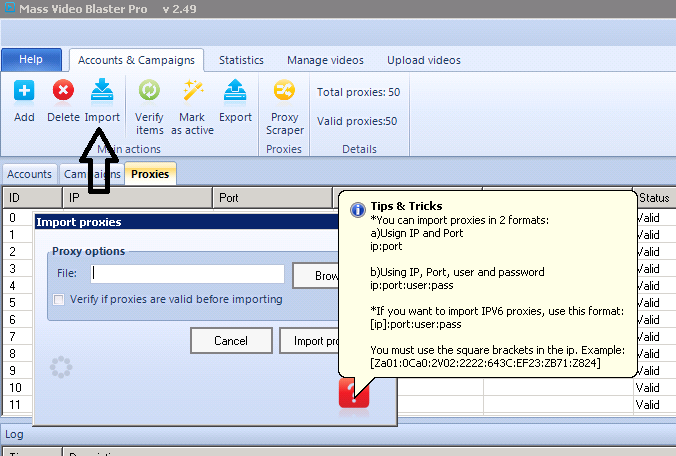
If you already have some proxies saved in a notepad file… click on the proxies tab > import > browse > find text file with proxies > import proxies. To make sure they’re all working highlight the proxies and click verify items. It should tell you their status.
Campaigns: You may wish to separate YouTube accounts and videos into various projects (or campaigns). So for instance, you may have YouTube accounts dedicated to health and fitness… others that focus on fashion. It's advisable to keep everything seperated by niche, project or whatever you feel approperiate. Adding a campaign is simple just click Add > Type in a campaign name > Add campaign.

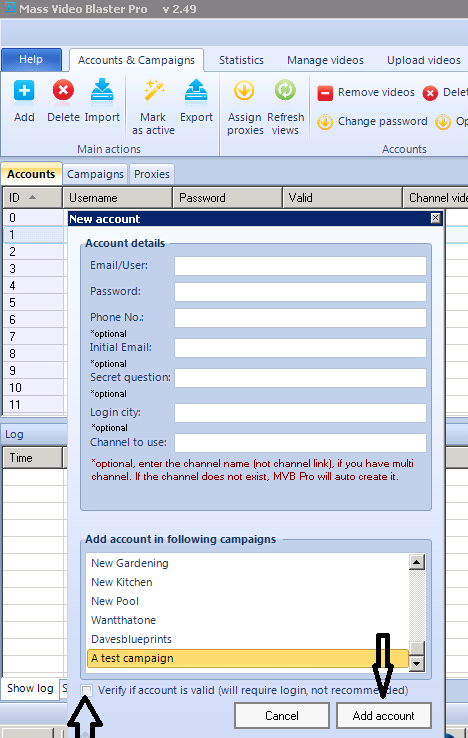
Accounts: now we’re going to add YouTube accounts. To add a single account click on Add > Input account details as required > Assign to a campaign > Add account . An account can be added to multiple campaigns, although to avoid complication I would recommend assigning accounts to only one campaign. Leave "verify if account is a valid (will require login, not recommended)" unchecked.
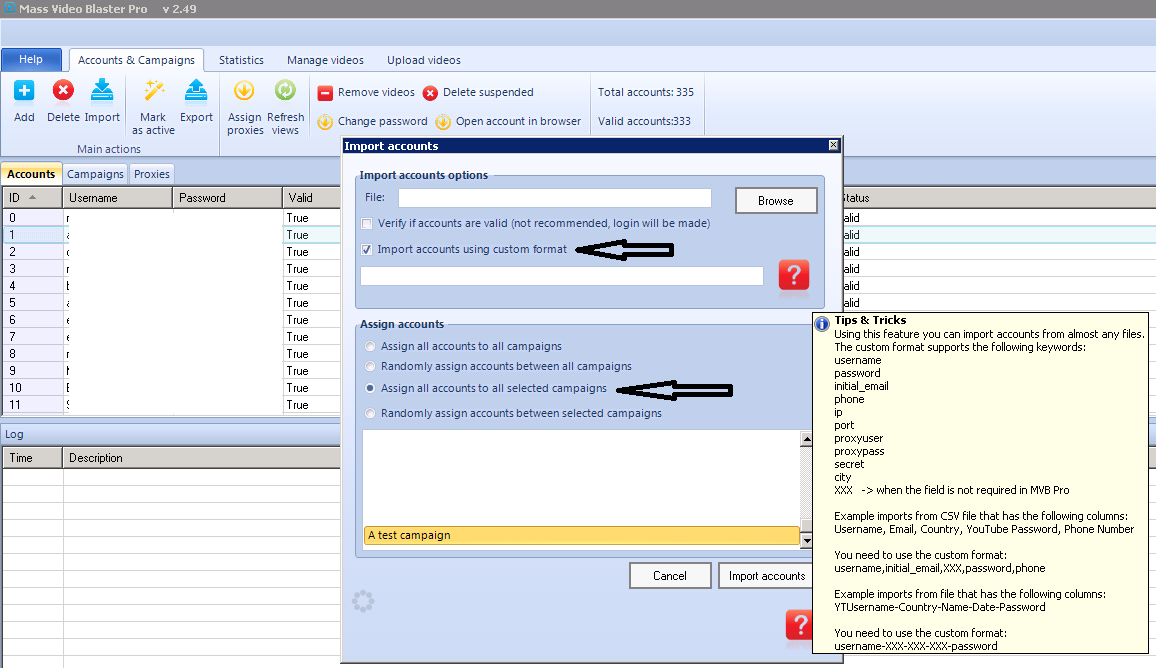
If you wish to add multiple accounts at the same time, this can be achieved via clicking Import. There are multiple ways you can import. I would recommend using the “import accounts using custom format” option. There is a ? Box which provides useful tips on how to create a custom import format and it will depend on the order
Once you’ve organised your CSV file / custom format, click on browse > find the CSV file > paste in custom format > choose which campaign/s to assign your accounts > click on import accounts.
Other we've added some accounts into the software, it's time to assign some proxies (assuming you intend to use them). You can randomly assign proxies for all of the accounts or you can assign proxies to selected accounts.

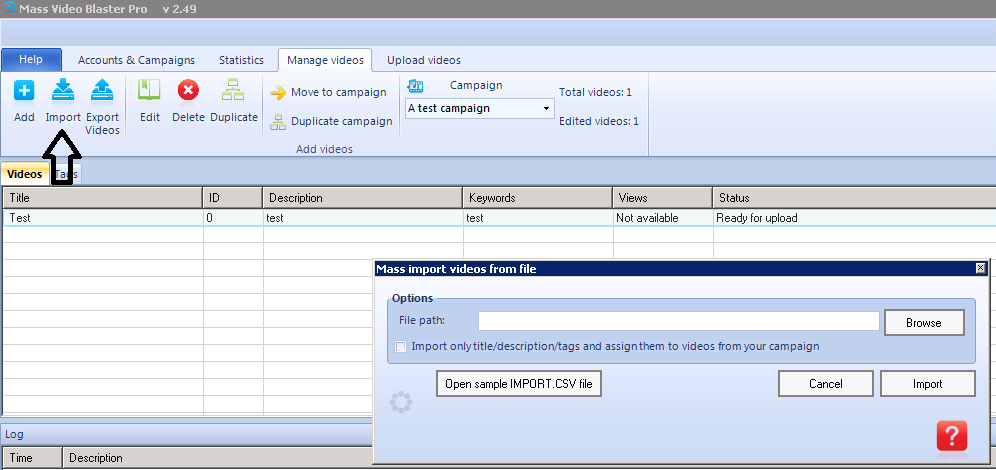
Manage videos: Now that we've added accounts, it's time to add some videos. You can do this multiple ways.
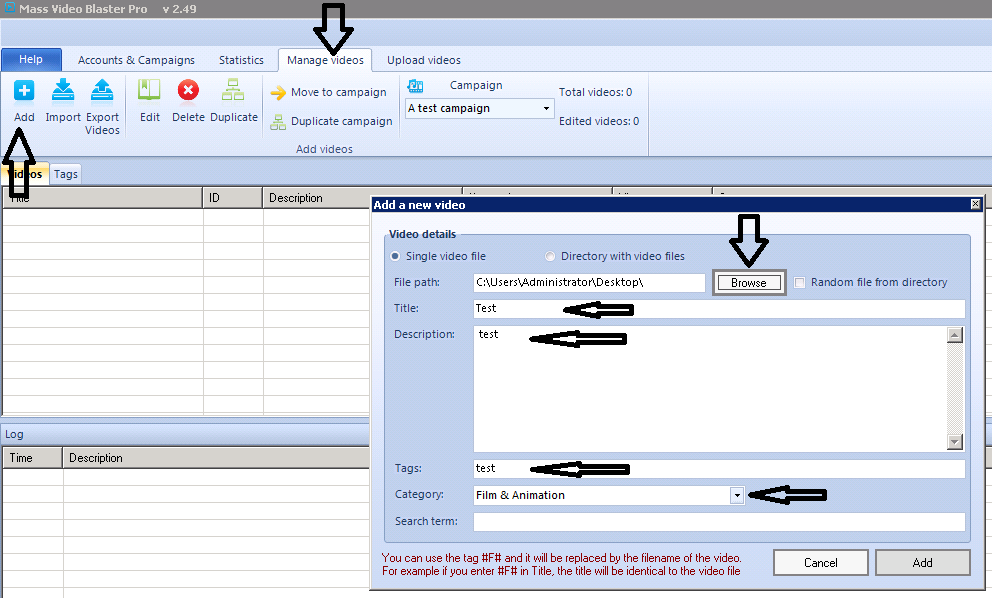
#1 Click on add. Click browse. Find the folder/video you wish to upload. Once you've found the video file… add a title, description and tag/s. These can be changed at any time after you've added the video. You can also click on the "directory with video files" if you wish to add multiple videos from the same folder.
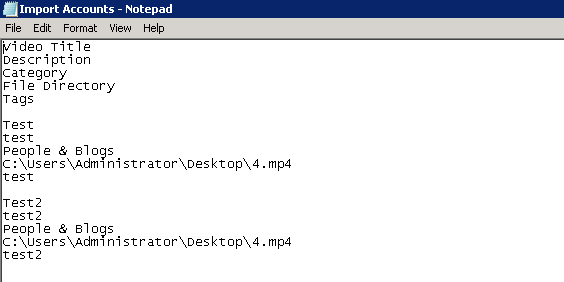
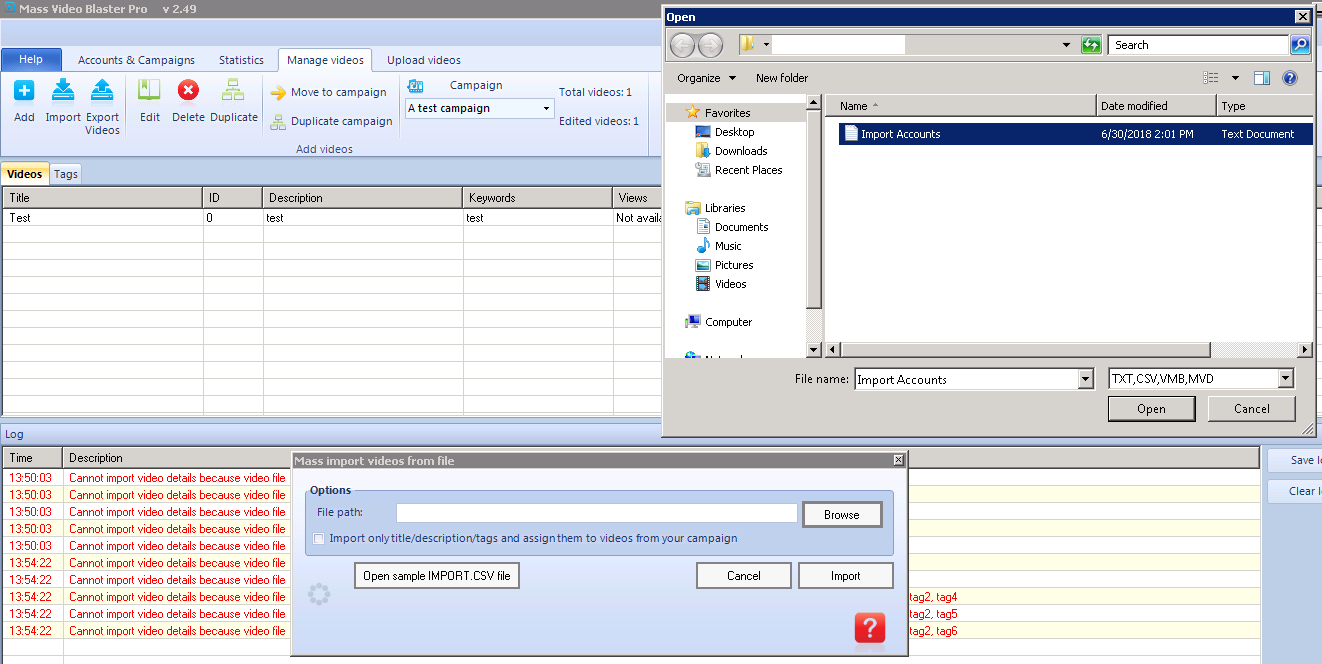
#2 You can also import multiple videos via a CSV file or a notepad file. Unfortunately, the last time I tested a CSV import it wasn't working for me (I will find out why), but I could still successfully Import videos via a notepad file. I should've called this notepad file Import videos instead of import accounts, just to clear up any confusion. So just follow the same format as the image below
Video Title
Description
Category
File Directory
Tags

Now you have some videos in your Campaign.

Head over to the upload videos tab. Firstly, we need to sign some YouTube accounts to these videos. This can be achieved a few ways
#1 Right click on the videos > Hover over Set accounts (manually) > Choose an account

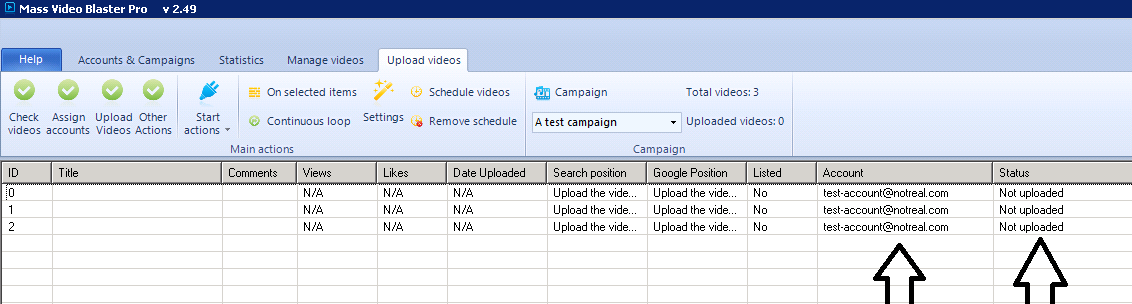
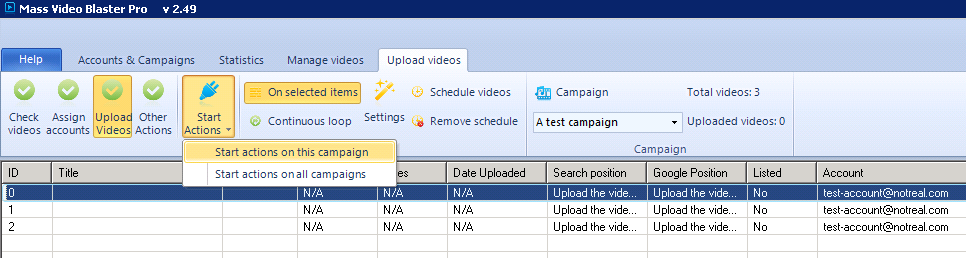
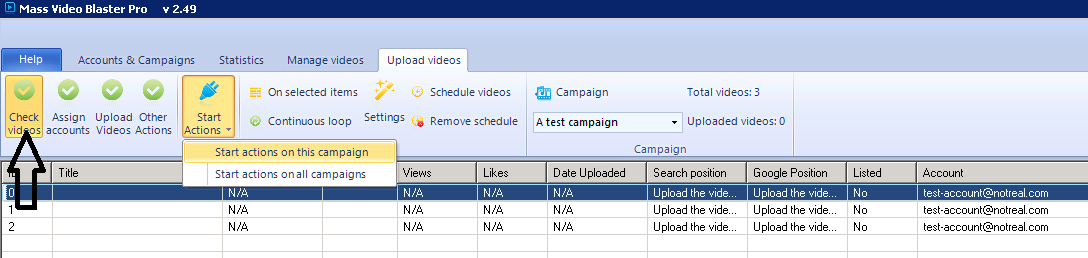
#2 You can also click on the Assign accounts button > Start actions > Start actions on this campaign.

If you only want to assign accounts to specific multiple videos, make sure you click the button that says On selected items.
Here I will go through some useful features shown in the upload videos tab.
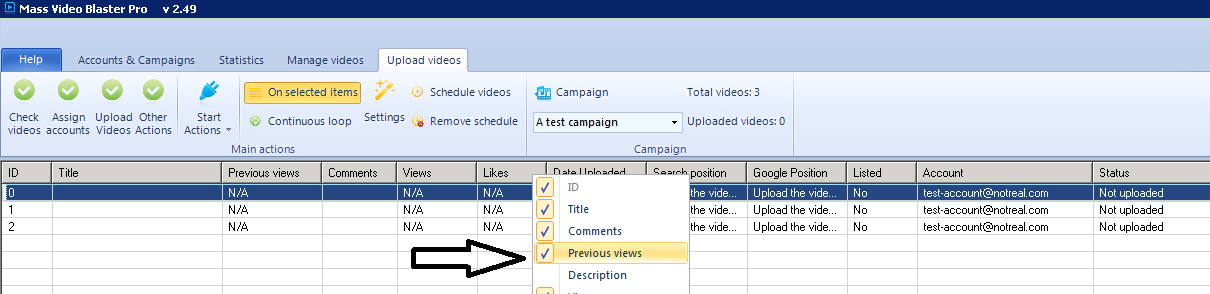
If you right click on the fitler otions i.e. ID, title, comments etc. You can add and remove filter options. I quite like using previous views so I can see how many views a video has increased by between checks.
Although we haven't uploaded any videos yet, once they are uploaded – you can use the check videos button to check how many views the video has, it's ranking posistion for the keyword you're trying to rank (in YouTube and Google). If you haven't set a keyword for the video, you can do so by right-clicking on the video > Edit > Enter the keyword in the search term box > Edit.
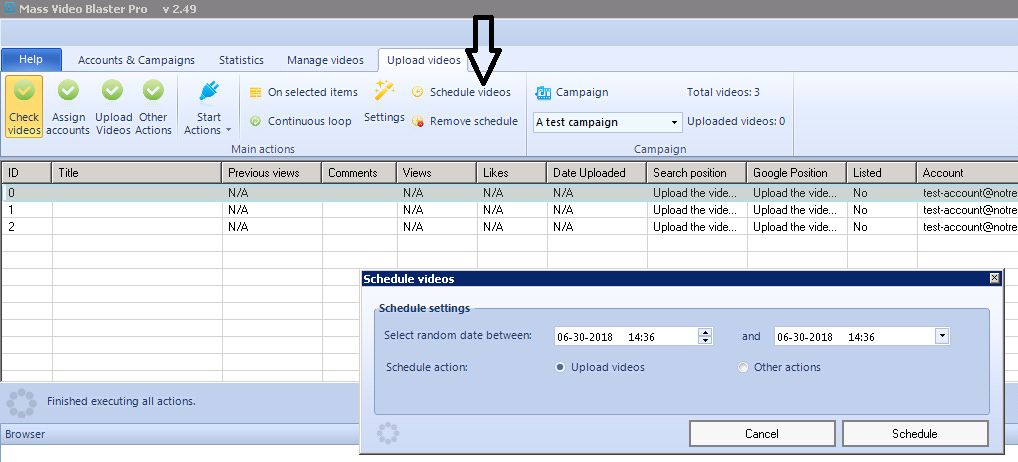
You can also schedule videos to upload between certain dates if you want a more set and forget approach to long-term uploading of content.
Here's a list of other actions you can do for your videos. It has everything from listing / unlisting to adding end screens. Some of the features don't work because they've been removed from YouTube (such as annotations), but there's still a lot of useful features there for ANY YouTuber.

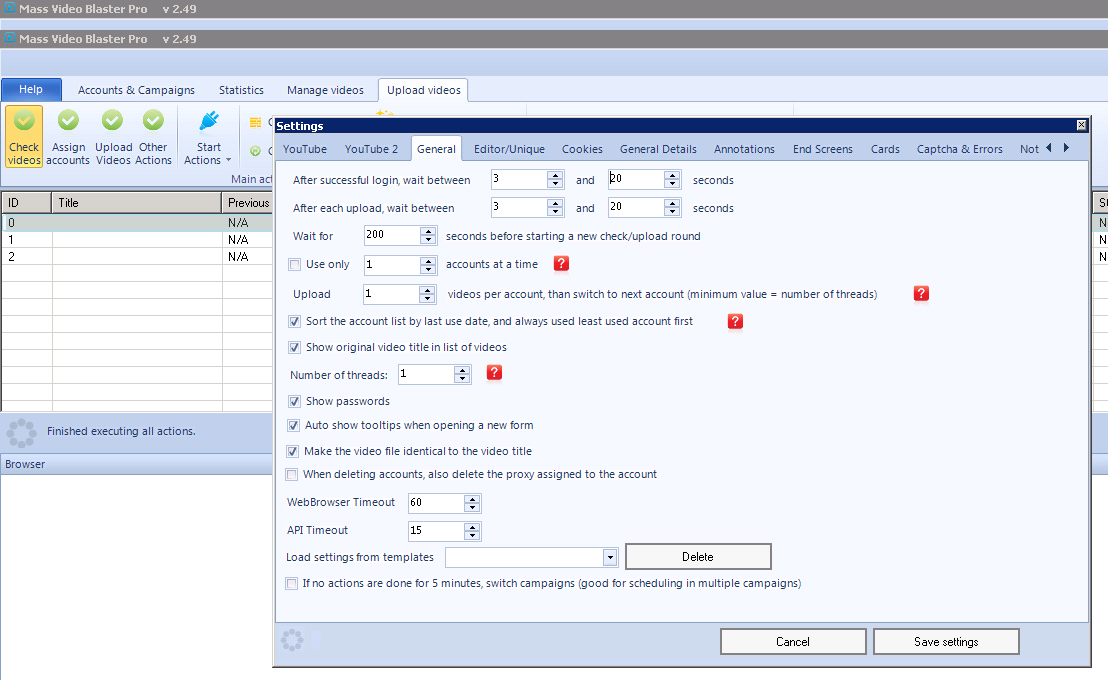
Let's go through the settings page. On the first tab YouTube
I would always stick with user NEW browser simulation for actions on your accounts, at least that's what the creators recommend anyway.
Browser type (User agent): Chrome is probably best as it's the most commonly used, although if you created the accounts in another browser and want to keep things consistent then choose something else.
Return position of video based on search term (and not title): By default, MVB Pro will check the ranking posistion of your video's title in YouTube / Google, which may be an issue if that title is something NOBODY would ever type into a search engine. So if you want it to check the keyword / search term that you set for a video, make sure to keep this box checked.
If you don't want your video to be live straight after uploading (maybe you want to double check everything), then check upload videos as unlisted.
If you want the software to check more pages on YouTube when searching for where your video ranks for a keyword, change the settings accordingly. The higher the number, the longer it will take. If you're only interested when your video gets into the top 20 results for a keyword, keep it as Search on 1 YouTue pages when returning the video posistion.
If you have any questions about settings I've missed out, please let me know.

There's nothing applicable on YouTube2 as it contains a feature that no longer applies / works on YouTube, so I've skipped to general.
Most of the settings are self-explanatory. Use wait betweens to appear random and like a human user. The question marks next to individuals settings will explain things further in the software.
I keep theads to 1 as bulk spamming / mass uploading is not my thing on YouTube, I use it to manage legitmate accounts and it's not necessary for me.
If you're scheduling uploads / actions across multiple campaigns the option at the bottom that says If no actions are done for five minutes switch campaigns (good for scheduling multiple campaigns) is extremely useful. So basically, if you leave the software running, it will just flick through the campaigns and if it lands on one with a video scheduled to be uploaded – it will stop and wait for it be completed before moving onto the next campaign. This makes things great for set and forget project if you've got content scheduled for weeks in advance.
Editor / Unique: If you're uploading the same video multiple times (maybe to run experiments for example), then you'll need to tweak some settings here. This page also has some really useful options also, such as the ability to add an intro or outro to your video. So if you have some short branding intro clip or a call to action for the end you could have the software automatically add it.
You can add a text watermark if you want text to be added over the top of the video (supports spinax so things are picked at random). You can add an image watermark if you want your logo to appear on a video for example.
If needed you can change the audio of the video and replace it with a random track from a folder.

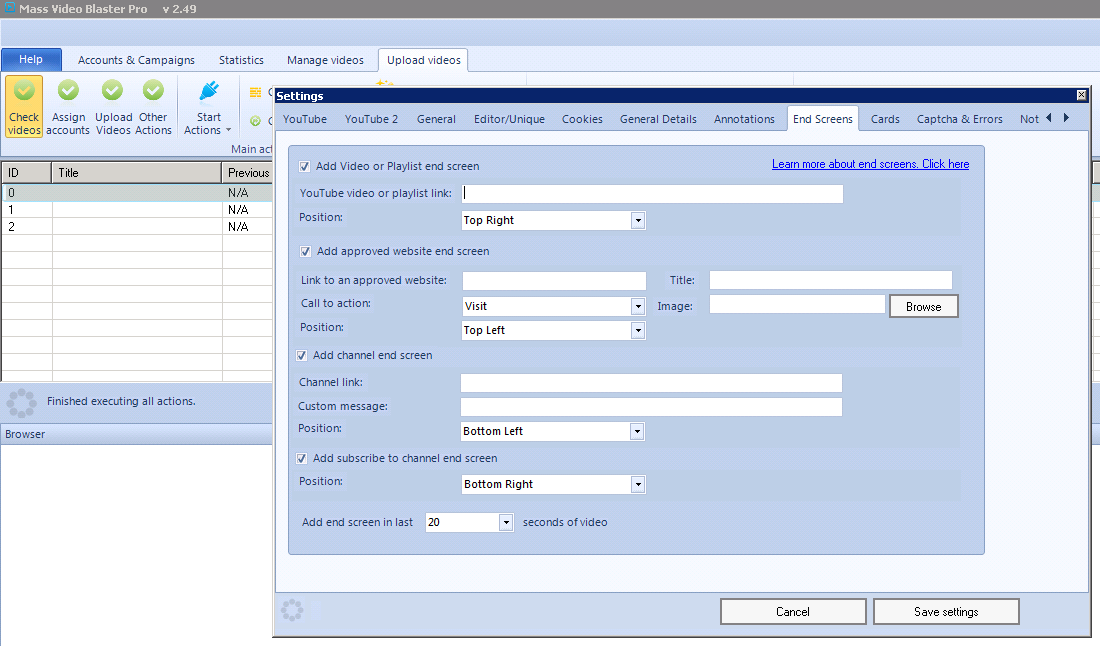
I haven't started using End Screens or Cards yet myself, but I likely will shortly. As you can see there are plenty of useful options here if you do use these features and this will help automate things instead of manually adding these features to every video you upload.